12/12/2023
Have you ever been in the situation of having a 3D model and the need to visualize it in Google Earth, either to approximate the project idea or as a tool for the work and/or design process?
This is possible through the use of KMZ files and their export to Google Earth, which, with the correct geolocation, makes it possible to view the model with total freedom and in turn perform various actions within it that could be useful when measuring conditions in large civil works, as well as railway lines, or in small and large urban projects, or simply to see volumetrically how our architectural proposal would look in the landscape.
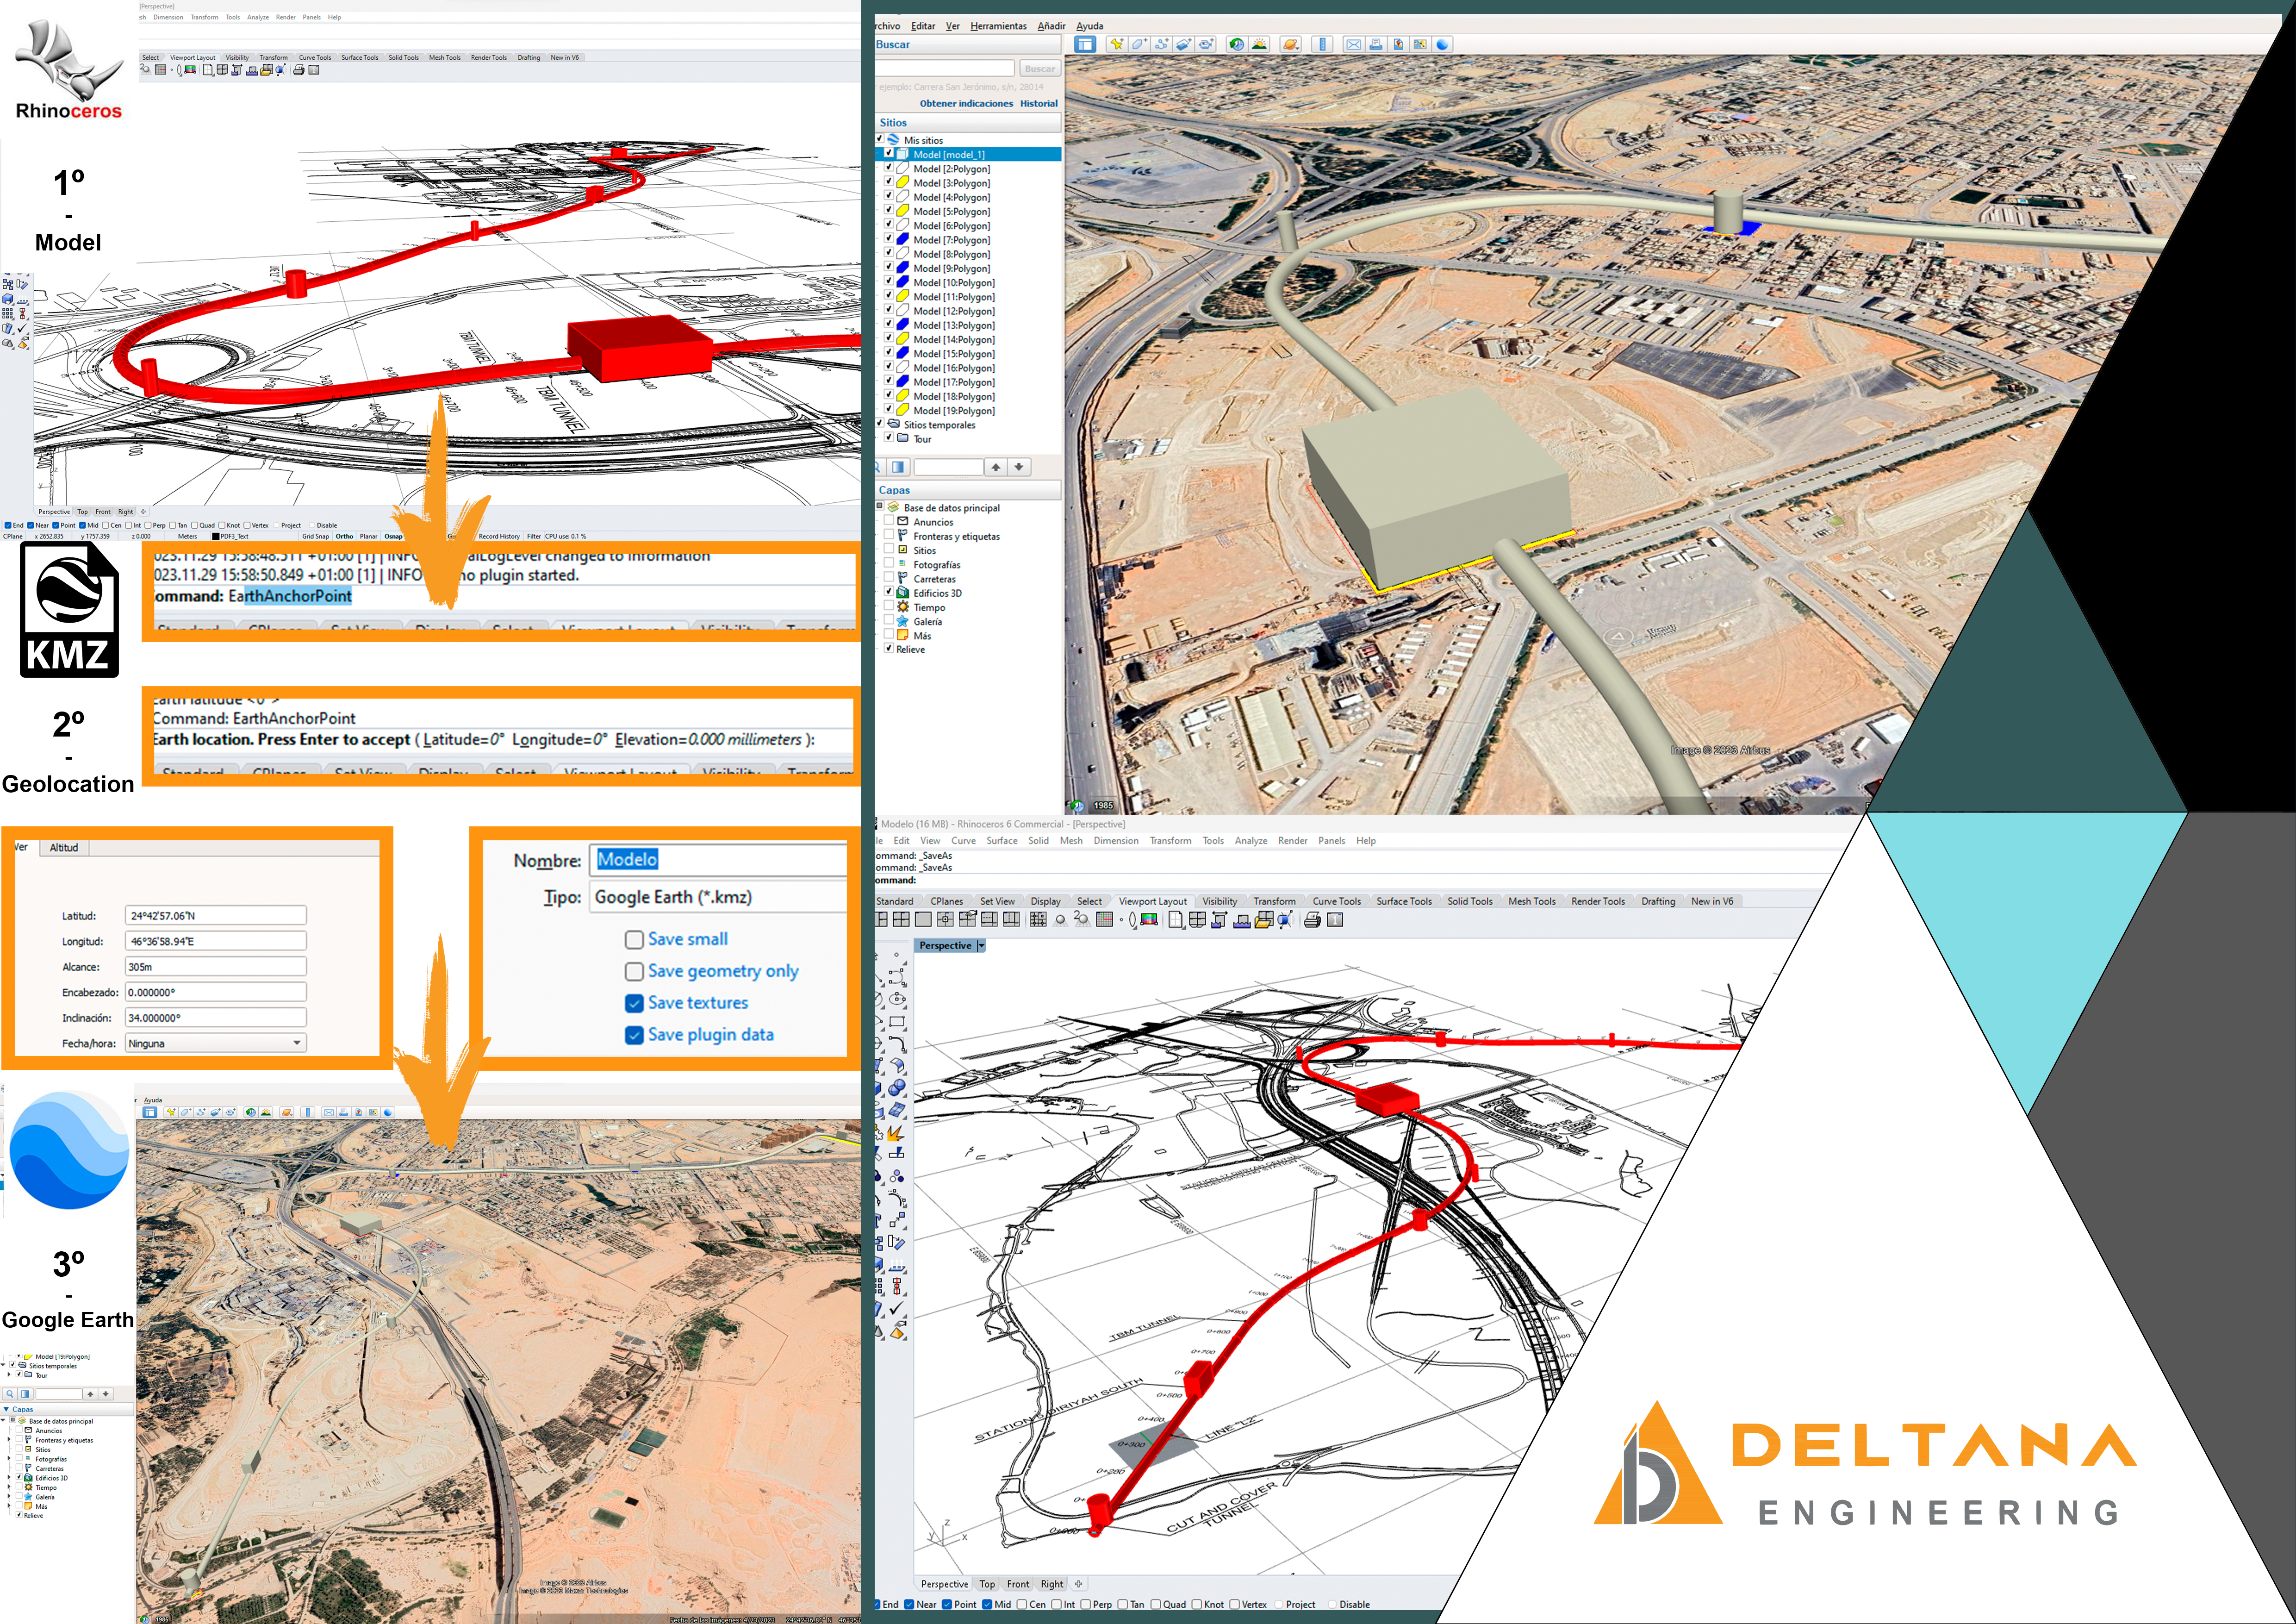
This may seem a complicated process, but it could be summarized in just 3 simple steps, which are as follows:
1. Model creation
Start your design in the modeling program that gives you more comfort, since for the export to KMZ file can be done from Rhinoceros 3D or Sketchup. In case of modeling in Revit or AutoCAD 3D you can always export them to Rhino or Sketchup when you finish modeling since only in these programs you can end up exporting to KMZ.
Be sure to maintain a precise and aligned structure, considering the use of layers and phases to organize the elements and facilitate future editions.
2. Geolocating and Exporting the Model to KMZ
To geolocate correctly in Rhino, we must first know the latitude, longitude, and elevation of a point we can reference in our project. To know this, we can go to Google Earth and locate the point that we can reference in our model, and then select "New Placemark" in the top toolbar, with the symbol of a yellow thumbtack, this will allow us to know the geographic data that we need to geolocate our model later in Rhino. This information can also be obtained from online maps or global positioning systems (GPS).
In Rhino, we will use the Earth Anchor Point command. This command prompts us for latitude, longitude, and elevation, creating a point to which we can move our project. In this way, we will establish an accurate connection between our model and its real geographic location.
In the case that we are modeling or we want to geolocate the model from Sketchup, the process is somewhat simpler since in the upper toolbar in file we will find a "Geolocation" option. This command will open a world map in which we can navigate to locate our project and we will delimit the area that we want or that approximately occupies our project (keep in mind that the area we select does not influence the scope of visualization and that the smaller the area the more detail inside).
Finally, in both programs we can export and save the model in KMZ format.
3. Visualization in Google Earth
When we open Google Earth, we will navigate to the location where we have geolocated our model.
In the top bar of Google Earth we will go to the file option and select Open and there we will see that by default the .kmz file option is already selected. When we open the file we will see that our model is now visible in Google Earth. In order to see it, we have to make sure that the 3D elements and the active topography are visible in the sidebar.
Depending on the level of mapping and information that the area where our project is located has, the amount of information that we can have in our model in Google Earth will vary. It must be taken into account that there will be areas, such as tourist cities, that will have even the buildings modeled in 3D, and in other areas we will only have a topography very close to what it would be in reality.
This tool is very useful in urban planning studies, since we can see in a basic model how our proposal fits into the pre-existing conditions. Or in the case of major civil works, such as excavations or railroads, we can measure the impact, demolitions, etc. in Google Earth itself. This approach not only improves the visual presentation, but also opens up opportunities for collaboration, effectively communicating design ideas in a real environment.


